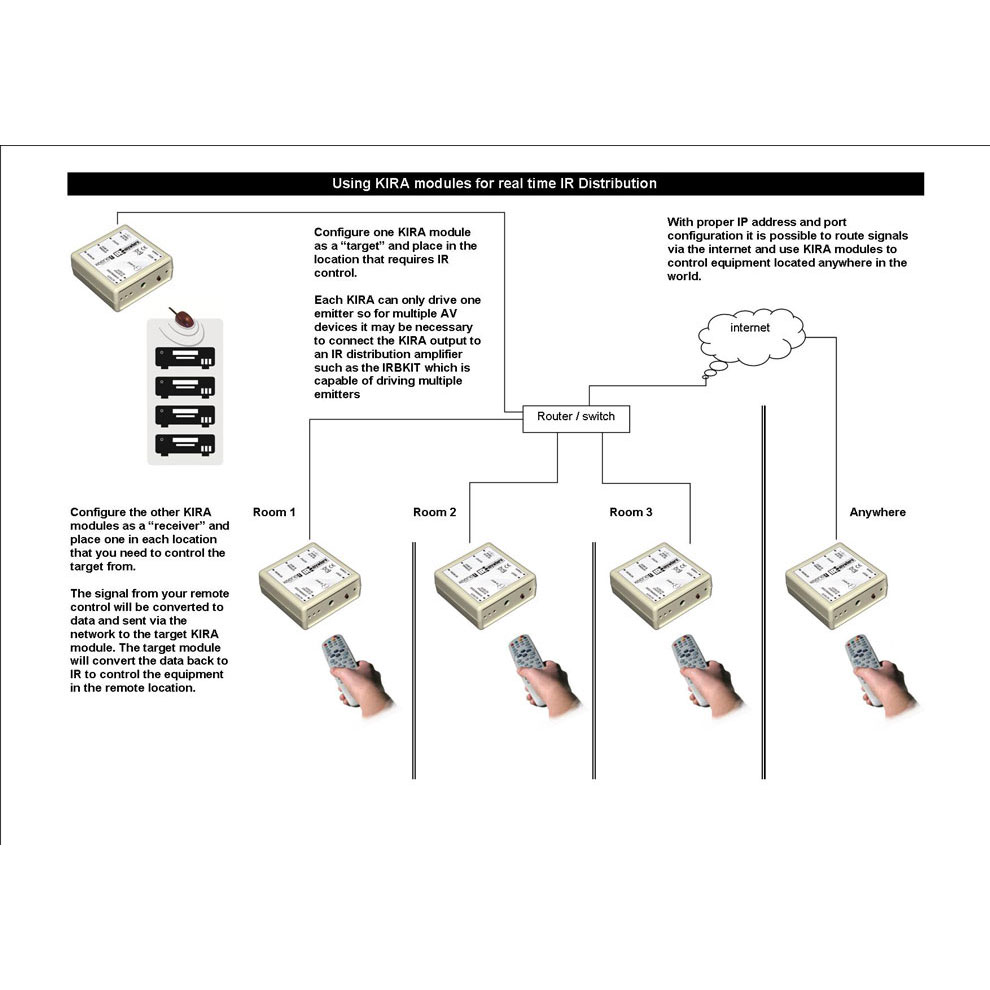
Remote Location Setup
Again, connect both modules to the local network and check that you can control the equipment from another room.
Once you are happy with the operation the next step is to configure the network access.
Step 5
Connect to the web pages for the target Kira. Make a note of the IP address that it is has been assigned and then disable the DHCP so it will always have the same local IP address. How?
Step 6
Log in to the router and set up port forwarding for that IP address. Forward UDP for port 65432. For details on how to do this consult the guide at no-ip.com and/or howtogeek.
Step 7
Set up a DDNS account from a provider such as no-ip.com and enter the credentials on the DDNS page of the Target Kira. In the Options page check “enable DDNS” then save and reboot. Make a note of the hostname and other credentials. This will let the no-ip service know the IP address associated with the hostname and keep it updated if it changes. How?
This completes the installation at that location.
Now return home and reconnect the Receiver to your own network.
See the full range
www.k2audio.co.ukFollow Us
FacebookMany thanks for the tv_user image by Peggy Marco