Connections


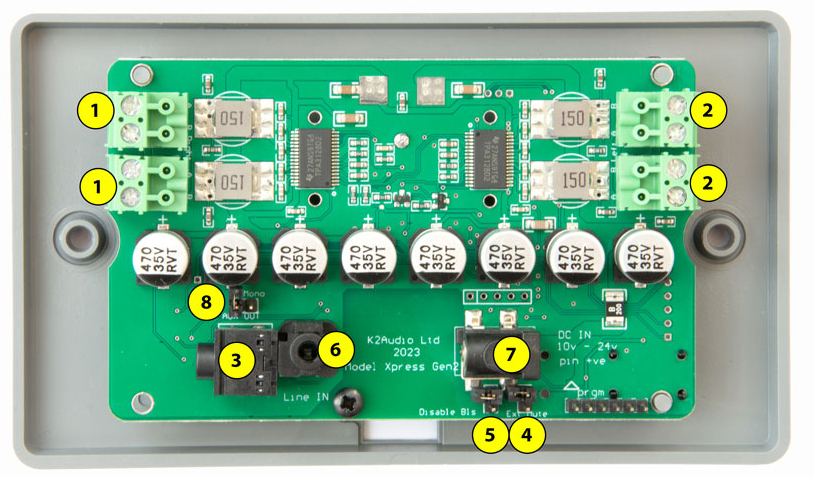
1 - Right channel 2 - Left channel loudspeaker connectors
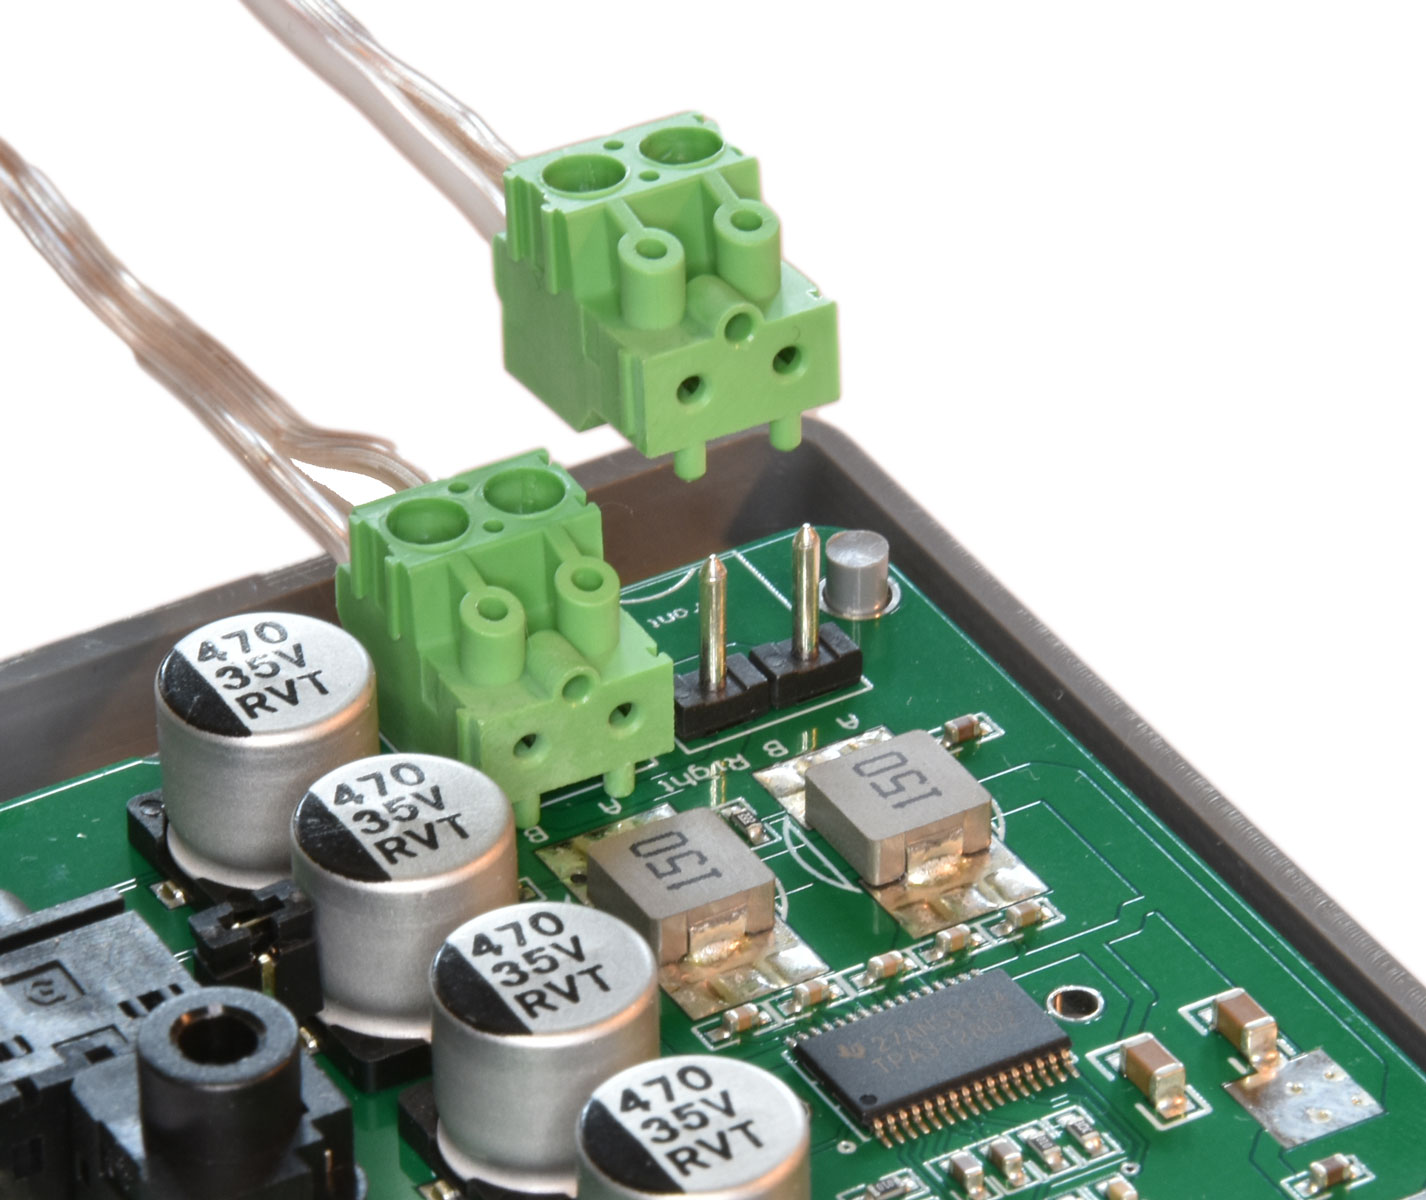
The KLABXBG2 allows for easy connection of up to four speakers using two speakers per channel. The connections use screw terminals and can be plugged and unplugged from the board for ease of installation. Each channels connectors are wired in parallel. For conventional stereo installation connect one speaker per channel. Each loudspeaker can be rated at 4ohm, 8ohm or 16ohm.
Take care to ensure that both the left and right phase connections are the same. For example if you’ve connected the left speaker positive to “+1” make sure that the right speaker positive also goes to “+1”. Please note that the amplifier is fully bridged so there is NOT a common ground or return connection.

Jumper / header
This jack will provide a line level output of whatever the amplifier is playing.
3 - Aux output jack (not fitted to all models)
A header (sometimes called a jumper) simply pushes onto exposed pins on a crcuit board to short them together. The KLAB makes use of headers for some settings:
4 - External voltage mute
This can be connected to an external system such as an alarm panel or PA system and used to mute the audio output. It can be set to mute if the pin goes high (3~12v) or mute if the pin goes low. Configuration is by the KSAS web page.
5 - Disable BLE web page
This header is fitted to one pin only by default and not active.It can be removed and used for mono mode as above or if placed across both pins here to disable the BLE pages. If fitted The KSAS page will still connect and read data but will be prevented from making any changes to the stored values. Useful if you do not want any volume or name changes to be made after installation.
6 - Rear line auxiliary input (not fitted to all models)
Depending upon the model there may be a 3.5mm jack socket on the front panel or rear mounted on the PCB (as shown above) or no socket at all. If either front or rear socket is fitted this can be used as another audio source for the amplifier. The bluetooth connection always takes priority so bluetooth device must be disconnected and the KLAB in standby (constant red LED) before the line input will be activated. It is monitored on signal level so the amplifer will automatically power up and operate whenever audio is detected. If the signal is disconnected or muted for more than 30 seconds the amplifier will revert to standby. If the line input is in use and a bluetooth connection is established the amplifier will switch to the bluetooth source.
7 - DC input
The amplifier requires a power supply of 12v to 18v DC centre positive and a minimum current of 3500mA. If you are not using the recommended psu please verify that the supply is correct BEFORE connection. If using the recommended supply we suggest that it is connected in accordance with current wiring regulations. The amplifier can also be powered from a 12v car battery but NOT directly from a car battery charger as this would damage the circuitry. Do not install near any heat sources such as radiators, stoves, or other apparatus that produce heat. The mains connection should be via a fused and switched mains outlet.
8 - Mono audio mode
This header is left off by default. If fitted the left and right audio channels will be commoned together and the left and right channel speaker outputs will produce identical mono audio. Useful if you only intend to fit a single speaker or want speakers in different rooms.
Installation
Installation should only be carried out by a qualified installer or electrician, as a certain amount of electrical knowledge is assumed.
Mounting
The 25mm depth will allow installation into standard UK 2-gang boxes, which may be galvanised metal for installation in solid walls, or plastic drylining (with lugs) or surface mount box or trunking system.
Important - please read!
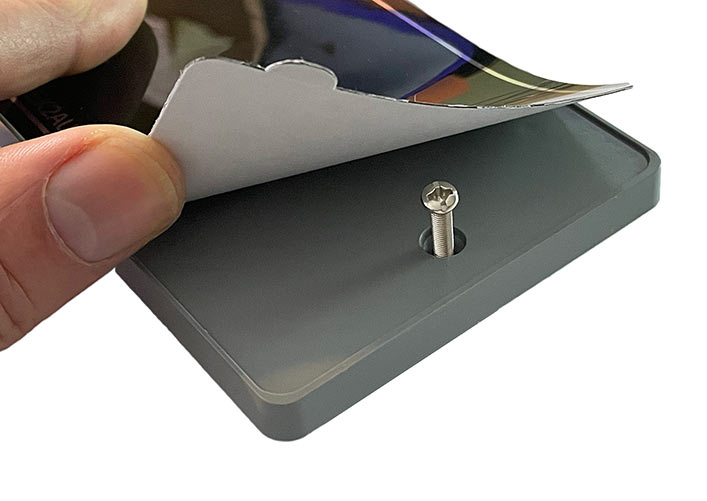
The front panel membrane has two tabs that can be flexed outward to allow access to the panel fixing screws. Once fastened in position and tested the backing paper can be peeled off and the tabs fixed down flush to conceal the screws. ONLY perform this operation once the installation has been tested and found to be satisfactory. Once stuck down these tabs cannot be removed without damage to the front panel.
Replacement front panels are available, (part number KLABXBG2FP or KLXBG2FPF for front aux input)

Wiring
In order to make a reliable and safe connection without short circuits it is recommended that the speaker cables and line input signal cables are prepared and tinned prior to connection, with no more than 1⁄4” or about 7mm of tinned wire extending out of the insulation.
Environment
The KLABXBG2 is not IP rated for use in a damp environments but if due care is given to positioning of the amplifier and supply then it can be used in zone 3 installations. Please use a qualified electrician operating to current regulations if you intend to use this unit in a bathroom.