Java Network options
When launched the Java program will scan the network and display the information on the first IP switch module that it finds.
![]()
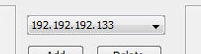
If there are multiple modules on the same network you can choose between them via the drop down button:
Menu option Actions > Find modules
This will open a text window and display all the discovered information about the modules on your network, including IP & MAC addresses together with current switch status.
Menu option Actions > Set all to current Subnet
This should only need to be used if your network does NOT use DHCP and you have attached the modules to a network with a address that is not 192.168.1.xxx.
For example, assume your local network has a 10.0.0.xxx base, you do not use DHCP and you have attached the modules.
Your will not be able to browse to these modules using the IP address or hostname because they are on a different subnet and your PC will not be able to "see" them. If you now press the change subnet button all of the IP addresses used by ALL ATTACHED MODULES will be changed to match your network. The default address for an IP Switch module is 192.168.1.37. For this example it would be changed to 10.0.0.37. The gateway will be changed to 10.0.0.1 etc. By typing http://netswitch into your browser bar you should now be able to reach the module and able to configure it as required.